
Showing posts with label projects. Show all posts
Showing posts with label projects. Show all posts
December 15, 2016
Magazine Spread

October 31, 2016
Lately
I'll admit that it's been more than a few weeks since my last post. I sort of let things run away from me and this blog fell by the wayside.
Lately my time has been taken up by work, school and practicing textile design. Currently I'm focusing on shibori which, in layman's terms, is basically the Japanese version of tie dye but elevated. Right now I've been practicing my itajime shibori which is a technique where you fold pieces of fabrics and clamp them prior to dyeing. Clamping the pieces using wooden or acrylic blocks allows parts of the fabric to resist the dye and remain white. I've done shibori work before with an indigo vat but it was a challenge, at first, trying it out with procion dyes. Patience is key and patience isn't exactly something I'm well known for.
It's a fun experiment and I finally managed to figure out the best way to achieve a good deep black in a cold dye bath. Typically any kind of black dye needs a hot bath but after a couple (well, more than a couple) small projects I've managed to achieve a blue tinged black that I'm totally in love with. I've also managed to figure out how to get crisp white resists against my dyes. The semi faded look is great with natural indigo but I really disliked how it looked against my black and amethyst shades.
Now that project after itajime project is coming out how I want them to it's time to try out the arashi (pole wrapping) method!
Lately my time has been taken up by work, school and practicing textile design. Currently I'm focusing on shibori which, in layman's terms, is basically the Japanese version of tie dye but elevated. Right now I've been practicing my itajime shibori which is a technique where you fold pieces of fabrics and clamp them prior to dyeing. Clamping the pieces using wooden or acrylic blocks allows parts of the fabric to resist the dye and remain white. I've done shibori work before with an indigo vat but it was a challenge, at first, trying it out with procion dyes. Patience is key and patience isn't exactly something I'm well known for.
It's a fun experiment and I finally managed to figure out the best way to achieve a good deep black in a cold dye bath. Typically any kind of black dye needs a hot bath but after a couple (well, more than a couple) small projects I've managed to achieve a blue tinged black that I'm totally in love with. I've also managed to figure out how to get crisp white resists against my dyes. The semi faded look is great with natural indigo but I really disliked how it looked against my black and amethyst shades.
Now that project after itajime project is coming out how I want them to it's time to try out the arashi (pole wrapping) method!
 |
| (the projects above are all available in my shop right now) |
September 23, 2016
More pillow designs


Here are two throw pillow cases I made this past week. The fronts are hand dyed cotton and the blacks are black cotton with an envelope closure. Both are currently in my shop with the ability to purchase an optional pillow insert.
I've been really enjoying this method of dyeing fabric but I will admit that I toss more than I keep. The method is very much centered around trial and error for me and if I'm not happy with the way a piece comes out there's no point in keeping it. Unfortunate since purchasing practice yardage eats quite a chunk out of my bi-weekly budget.
I really wish I was able to take better photos, colors in real life always look so much brighter. Unfortunately my almost but not quite a DSLR camera bit the dust recently so I'm relegated to using my phone for photos until I can save up for another camera.
September 16, 2016
Watercolor hand dyed throw pillow
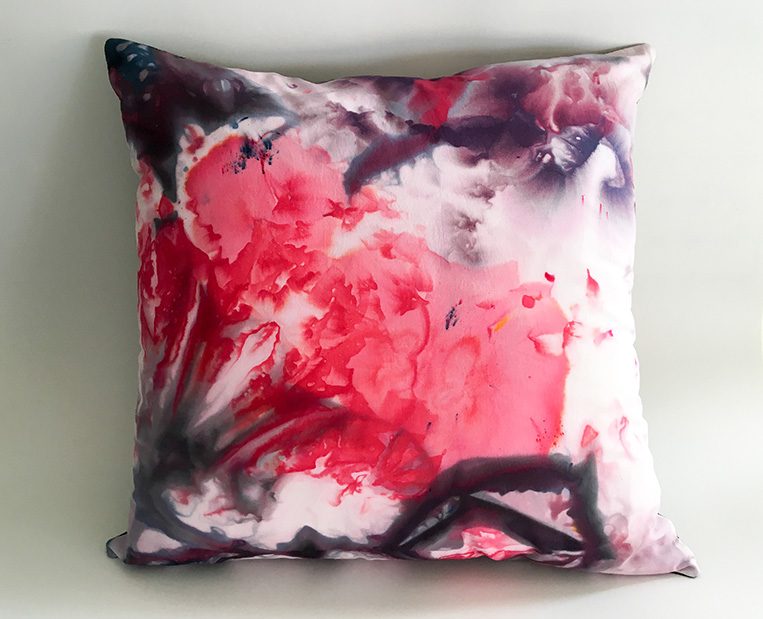


This hand dyed throw pillow was an experiment in color mixing. Using a handful of dyes I was able to achieve the colors you see above. I couldn't bear to cut this piece apart so I turned it into a square accent pillow. It's the perfect piece to add a pop of color to a bedroom or living room.
This piece measures approximately 15" by 15". The front is 100% hand dyed cotton and the back is a black 100% cotton. Hand finished with a polyester pillow insert. Now available in my shop.
Watercolor zippered clutch


This zippered clutch features two pieces of fabric hand dyed by myself. I mixed together two different dyes to achieve the dark purples and indigo blues you see above. The exterior fabric is 100% cotton twill and the interior is an easy to clean polyester lining.
Now available in my Etsy shop. The partner to this piece (cut from the same piece of dyed fabric) will be available, by the latest, at the start of next week.
September 12, 2016
Adventures in textile design


After taking a course in textile design last semester I've been enamored with creating my own wearable art pieces. I've done quite a bit of eco dyeing, started up my own indigo vat and dabbled in fabric painting with procion dyes mixed with a sodium alginate solution. I also did some screen printing and while I do love me some prints (especially novelty ones) I was more drawn to organic looking pieces and the fact that I can make each piece one of a kind. I was dyeing something almost every day and then I just...stopped. I can't tell you why I stopped (well, I could but it's a fairly long story that starts off with me being unhappy) I just did.
The past couple of weeks I've been slowly easing myself back into textile design. No boiling pots of vinegar water or letting indigo oxidize right now. The technique that I've been playing around with is fairly easy and non-labor intensive. I can get my projects started and then go and do some classwork. The hardest part about this dye process is letting the pieces cure for 24 hours. I'm an impatient person and I want to see my results now, damn it!
The pieces above were an experiment using some new procion (fiber reactive) dyes I ordered from Dharma. I wanted to see how they would react to both each other and the fabric. I'm pretty pleased with the results! I'm not exactly where I would like to be but that comes with more practice and learning to be more selective about dye placement. Less is more.
My favorite piece is the top one. For some reason I just adore the splotches of red mixed with black. I know for certain that that piece will end up as a throw pillow on my Etsy shop. The amethyst piece is also gorgeous. Blacks turned grey and they mingled with the amethyst I got a gorgeous deep purple. The amethyst piece will end up as two pillows, two zippered clutches and maybe a few organic lavender sachets. Stay tuned.
Here's to hoping that the project I started this morning turns out half as well. I have some pieces of various types of cotton going along with a white button down and a large cotton gauze scarf curing. Once I get this technique down I plan to dye at least 5 yards of fabric for my department's "Fashion Redux" competition. The San Diego History Center decided on the 1950s this year which, if you've seen my racks of vintage clothing, is my favorite era of fashion.
Subscribe to:
Posts
(
Atom
)